

Using Monday.com Webforms to Automate Personalized Emails and Seamlessly Integrate with WordPress
Automation is at the heart of modern workflows. By leveraging Monday.com’s Webforms, you can simplify data collection and automate tasks like sending personalized emails, streamlining your communication processes. Furthermore, embedding these forms directly into your WordPress site enhances accessibility and user interaction. This article will guide you through creating automated Webforms in Monday.com to send personalized emails and integrate them with WordPress using iframes. Let’s dive in!
What Are Monday.com Webforms?
Monday.com Webforms are powerful tools that allow you to collect data directly into your boards. They act as a bridge between your users and your workflow automation. The benefits include ease of use, integration with automation, customizable fields, and the ability to embed forms directly onto websites like WordPress. With these features, you can streamline processes while enhancing user interaction.
Step 1: Create a Webform in Monday.com
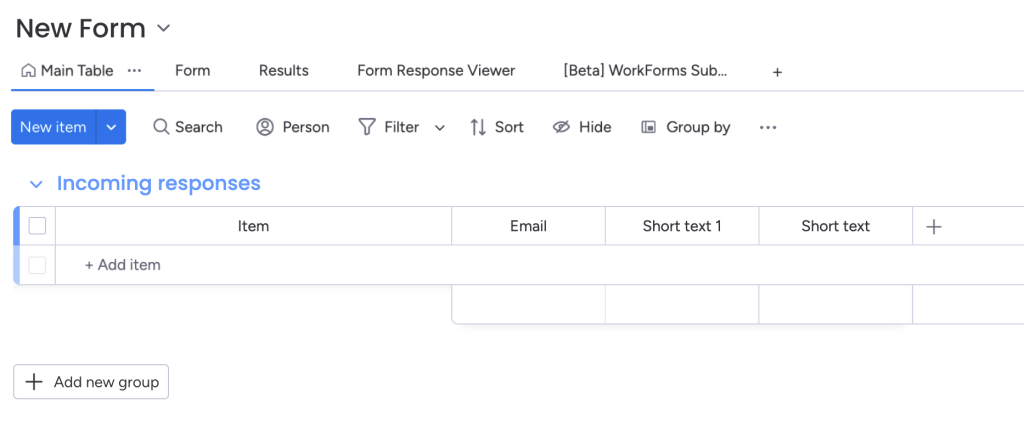
To begin, log in to your Monday.com account and create a new board. Name the board according to your use case, such as “User Inquiries” or “PDF Requests.” Add columns to the board to capture the necessary data, such as a text column for names, an email column for user addresses, and additional fields if needed, like a dropdown for preferences or a text field for comments.
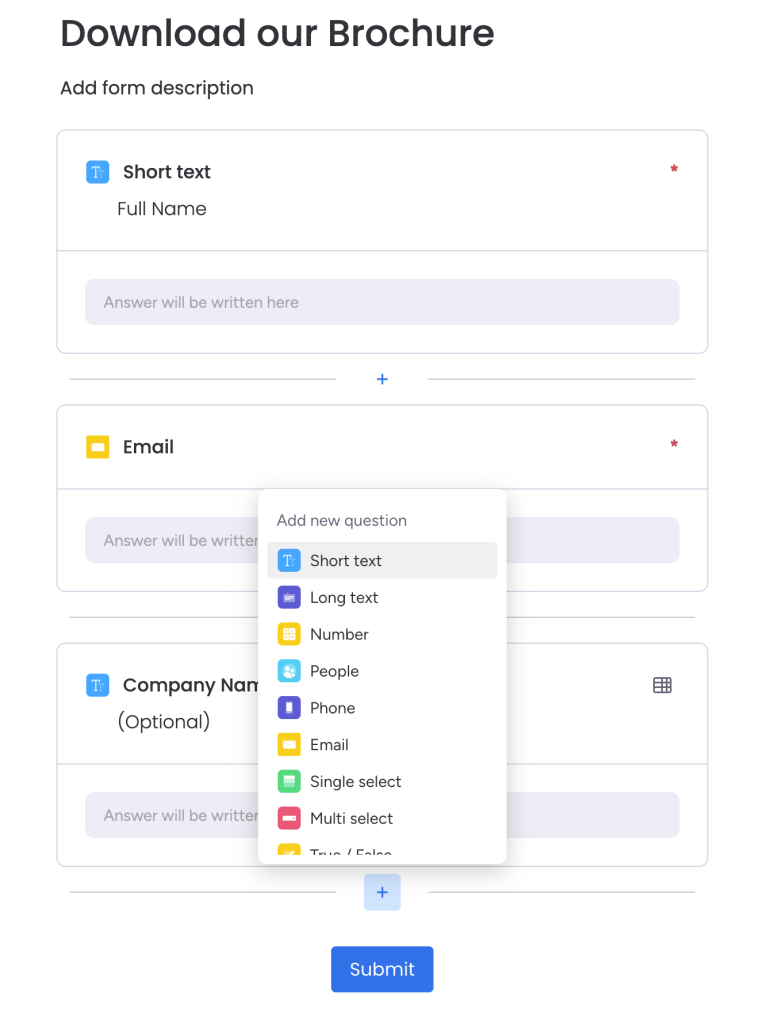
Once the board is ready, add a Webform view. Open the board, click on “+ Add View,” and select the Forms option. Customize the form by dragging and dropping fields from your board, adding a title and description for clarity, and setting required fields where necessary. After saving, copy the shareable link provided for the form.
Step 2: Automate Email Sending on Form Submission
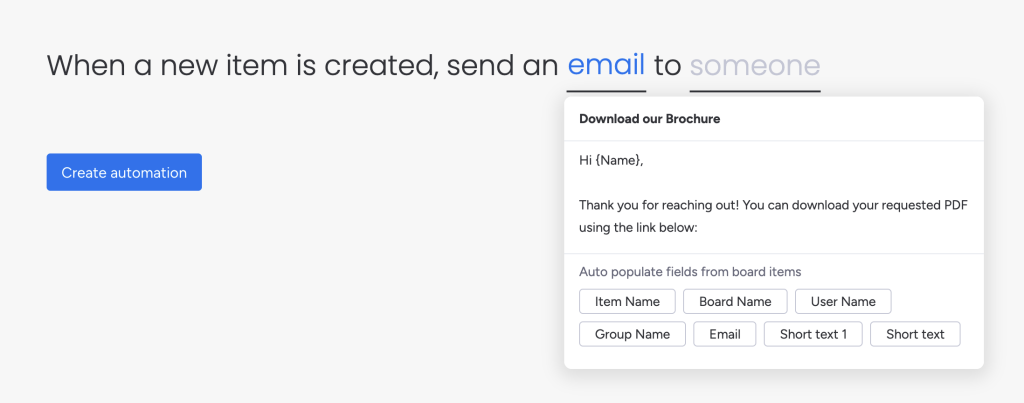
To automate email notifications when a form is submitted, configure an automation recipe in Monday.com. Open your board and navigate to the Automations section. Select the recipe titled “When an item is created, send an email to someone.”
Customize the automation by setting the recipient field to the Email column from your board. Then, create a personalized email template. For instance, your email could include a message like:
“Hi {Name},
Thank you for reaching out! You can download your requested PDF using the link below:
[Insert PDF Link]
Best regards, [Your Company Name]”
Save the automation to ensure it is activated for all future submissions.

Step 3: Host the PDF File
Before your email automation can function effectively, you need a publicly accessible link to your PDF file. You can host the file in your WordPress Media Library by uploading it via the dashboard and copying the file’s URL. Alternatively, use cloud storage services like Google Drive or Dropbox, ensuring the file is shared publicly, and copy the shareable link.
Step 4: Integrate the Webform with WordPress
Embedding the Monday.com Webform into WordPress can be accomplished easily using iframes. Start by copying the Webform’s shareable link from Monday.com. Next, add an iframe to your WordPress page or post. Use the following example code for the iframe:
<iframe src="https://forms.monday.com/forms/your-form-link" width="100%" height="500" frameborder="0" style="border: none;"></iframe>Replace the placeholder URL with your actual Webform link. To embed this code, log in to your WordPress admin dashboard, open the page or post where you want the form to appear, and switch to the HTML editor (or use a custom HTML block in the Block Editor). Paste the iframe code and save or update the page. Finally, preview the page to ensure the form displays correctly and is responsive.
Step 5: Test the Workflow
Testing ensures that your workflow operates smoothly. Visit the embedded form on your WordPress site and submit a test entry. Check your Monday.com board to confirm that the item is created. Verify that the automated email is sent to the correct email address and includes the personalized message along with the PDF link.
Enhancements and Best Practices
To ensure the iframe integrates seamlessly with your site’s design, consider adding custom CSS for styling. For example, you can apply rounded corners or a shadow effect to the iframe for a polished look. If you plan to send different PDFs based on user preferences, you can add a dropdown column to your board and configure conditional automations to send emails with specific links based on the dropdown selection.
Additionally, to prevent spam submissions, integrate Google reCAPTCHA into your Webform. This extra step enhances security and maintains the quality of your collected data.
Conclusion
By using Monday.com’s Webforms and automation recipes, you can efficiently collect data, send personalized emails, and provide downloadable content to your audience. Embedding the form into your WordPress site using iframes makes it accessible and user-friendly. This seamless integration not only saves time but also enhances the user experience.
Implementing these steps ensures a fully automated, professional workflow. Whether you’re managing customer inquiries, offering downloadable resources, or streamlining internal processes, this setup is versatile and robust. Start building your Monday.com Webform today and experience the benefits of automation and integration firsthand!
Need Help?
If you need assistance with automating your workflows or integrating tools like Monday.com and WordPress, get in touch with us. Our team of experts can help streamline your processes and deliver a tailored solution for your business!